For fun activities and more information on Dinosaurs,
Market Maze, Slithery Snakes, and how EcoMazes was made,
click here: DINOS, EcoMAZES, MARKET MAZE, SLITHERY SNAKES
Market Maze, Slithery Snakes, and how EcoMazes was made,
click here: DINOS, EcoMAZES, MARKET MAZE, SLITHERY SNAKES
How to make a geometric maze
Using a piece of graph paper is very helpful, because it is important that all your paths are the same width. Use a pencil, so you can erase.
Later, when you've made the final maze, go over your lines in ink.
Photocopy your maze and give it to your family or friends to solve. After you've made a couple of mazes, you can start to make them more complicated or personal.
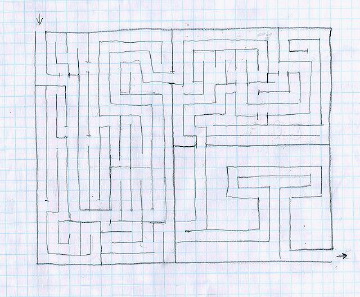
We are going to make a maze with only one solution, but it will have false endings and cul-de-sacs, in order to make it more of a challenge to solve. It's not fun if it's too easy!
Using a piece of graph paper is very helpful, because it is important that all your paths are the same width. Use a pencil, so you can erase.
Later, when you've made the final maze, go over your lines in ink.
Photocopy your maze and give it to your family or friends to solve. After you've made a couple of mazes, you can start to make them more complicated or personal.
We are going to make a maze with only one solution, but it will have false endings and cul-de-sacs, in order to make it more of a challenge to solve. It's not fun if it's too easy!
|
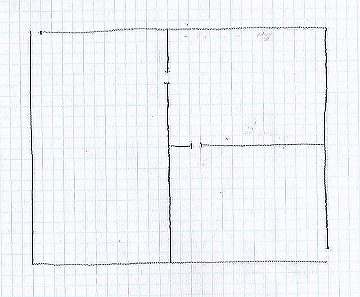
Draw a rectangle with a starting point (opening) on the upper left and the finish in the lower right corner. Divide it into three areas, with one more opening in each- this creates a bottleneck going from one section to the other. You could make it just one big rectangle, but this is a little more fun. Later, you can add more rectangles if you want a more complex maze.
|
|
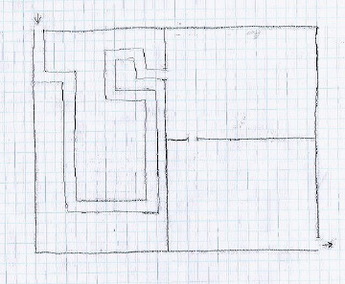
Draw a variable path from the upper left starting point to the other opening in the first rectangle.
|
|
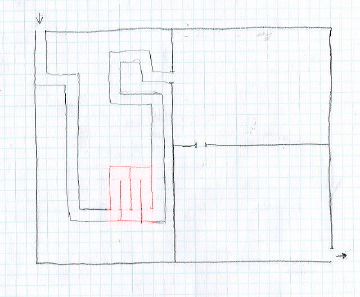
Just for fun, and to add complexity, let's make the path a little more complicated, where the area in red is highlighted.
|
|
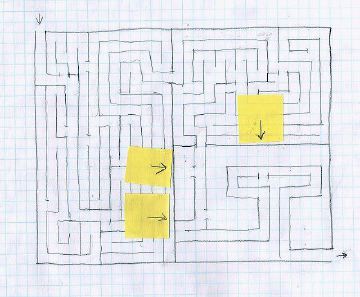
Make an opening in the path (erase a small part of the pencil line opposite the yellow post-it with the arrow) into section A. Draw a line above the yellow post-it at the bottom up to the path to create section A.
|

|
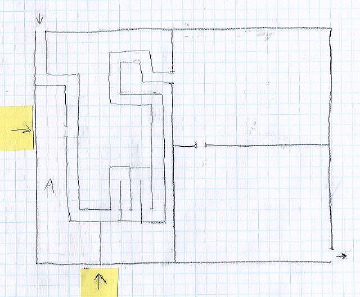
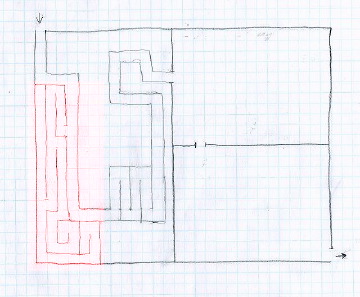
Now fill in section A (outlined in red here) with lines and spaces. It leads nowhere - it's a dead end, but it fills up part of the maze and may trick someone into taking that wrong turn.
|
|
Now fill in section A (outlined in red here) with lines and spaces. It leads nowhere - it's a dead end, but it fills up part of the maze and may trick someone into taking that wrong turn.
|
|
Create an opening (erase a part of the pencil line) where the yellow post-it arrow points. This will be another dead-end area of the maze.
|
|
Fill in section B...this will be another dead-end area to get lost in.
|
|
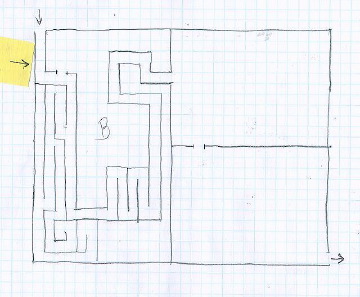
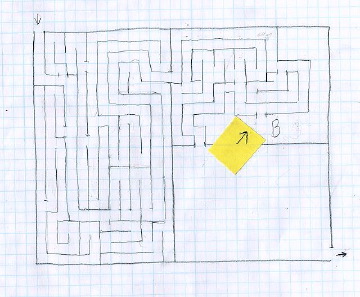
Opposite the yellow post-it arrow, erase the line for an opening into the C section.
|
|
Fill in section C...this will be a dead-end area.
|
|
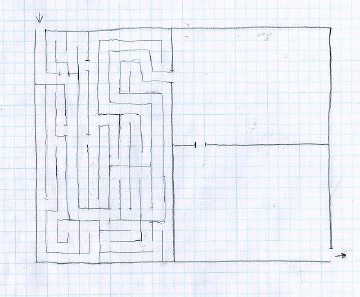
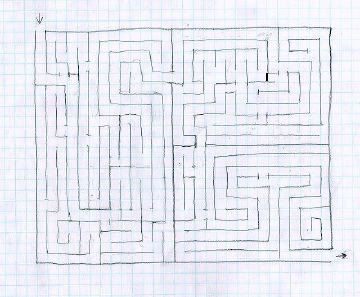
Now draw a path through the second rectangle from the opening on the left to the opening in the third rectangle.
|

|
Where the arrows on the yellow post-its point, erase the sections of the pencil lines making the path.
|
|
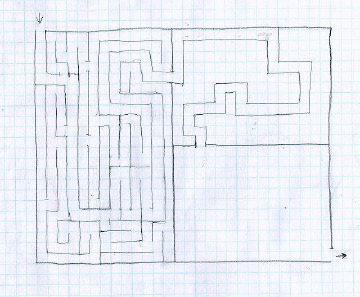
Draw in paths. Erase a spot in the path where the yellow post-it arrow points.
|
|
Fill in that section, creating another blind alley.
|
|
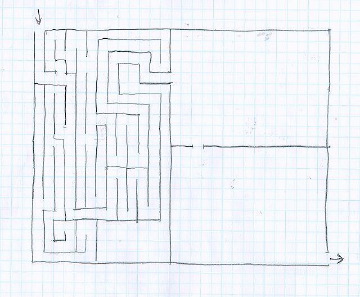
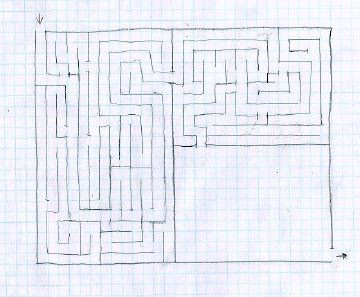
Now draw a meandering path from that rectangle down to the lower right corner...the finish line!
|
|
Erase openings in the path into the remaining empty rectangles.
|
|
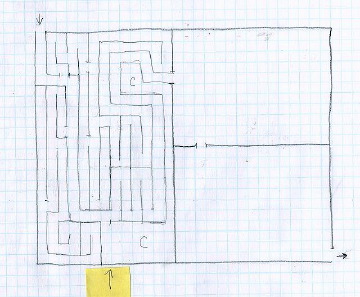
Fill in the remaining spaces with dead ends....you're almost finished!
|
|
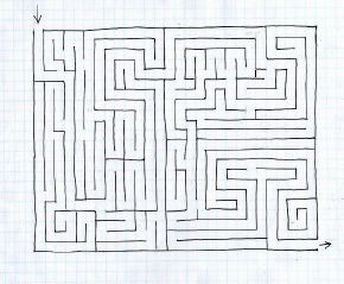
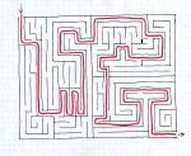
Trace the lines in ink, and erase the pencil lines underneath. You're finished! You've created a cool geometric maze. You can make more mazes - change the paths, or make four or five rectangles leading into each other. Photocopy your maze and give it to your friends to solve.
|